|
===Mani Favoriti===
|


====Jaunumi====
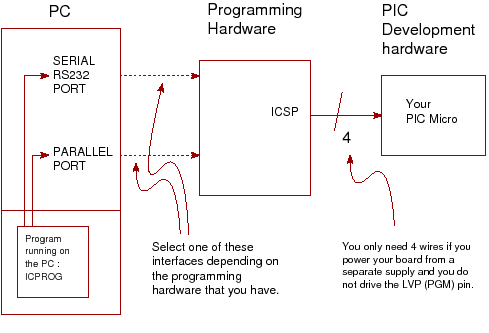
PIC Programming using ICSP and ICPROG.How to program your PIC microcontroller using ICSP...
This
page shows you how to use ICSP for
PIC programming giving some ICSP
connection diagrams and it also shows how to use ICPROG - the PC
software for programming a
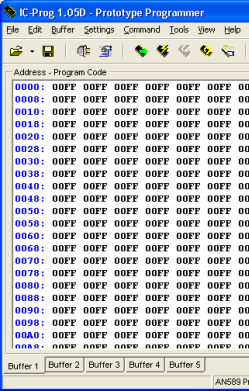
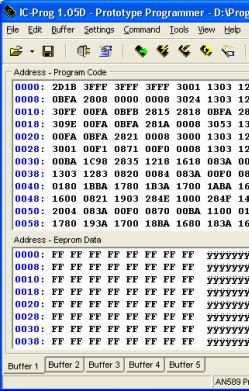
PIC Micro. PIC ICSP connectionsThis section shows connection pins for PIC programming.12F675 : ICSP PIC Programming connections: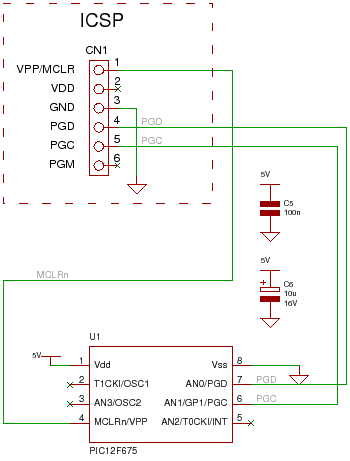 16F88 : ICSP PIC Programming connections: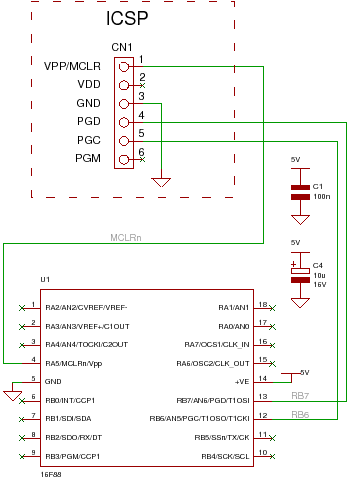 16F877A : ICSP PIC Programming connections: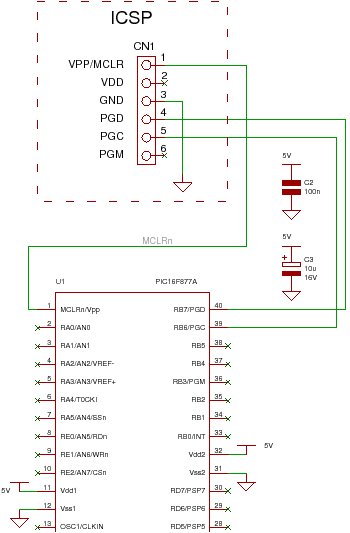 ICPROG for PICMicroICPROG is a free windows program that you can use for PIC Programming. It interfaces using either the serial or parallel port on a PC, via programming hardware, to the ICSP pins on the PIC micro.You can download ICPROG here [opens a new window]. ICPROG uses the hex file generated either from an assembler such as MPASM or a compiler such as MikroC. When you first start ICPROG this is the screen you see for selecting the hardware for the PIC programmer; I have selected AN589 programmer - a parallel port programmer. 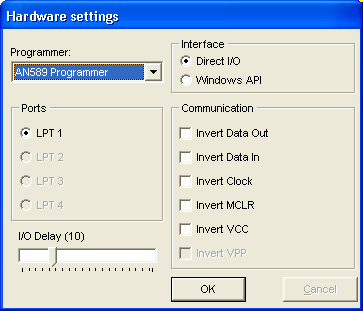 After this the main program screen is displayed. Don't be put off by all the address program code area. The important controls are the Open button and the buttons with ICs underneath.
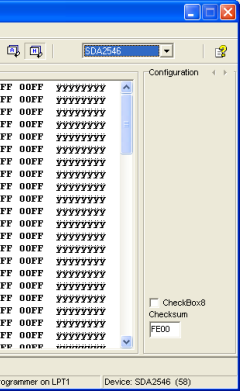
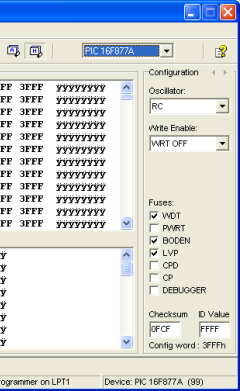
Select DeviceTo use it for PIC programming select the device from the menu Settings-->Device--> Microchip PIC. Here I have chosen a PIC16F877A device. The Device menu also shows a lot of other devices that you can use with ICPROG. Note: The screen changes to accommodate the chip features (here EEPROM oscillator, program 'Write enable' and chip configuration bits).
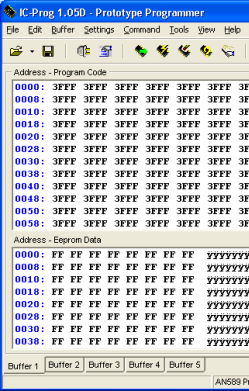
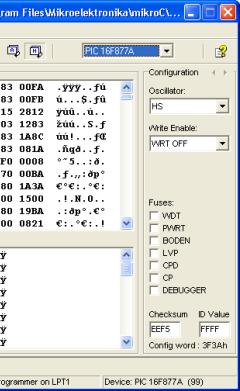
Hardware checkYou can check to see if ICPROG is communicating with your hardware by using the menu option Settings-->Hardware check. This lets you toggle the state of individual ICSP signals and the VCC power.Note you'll need an oscilloscope or multimeter to check the signal state. Load Hex fileThe next thing to do with the PIC software is programming the PIC by loading up the hex file (unless you have a 12F675 that has an oscillator calibration value that you will want to keep -in this case do a read first).Note: You have to select the device manually it is not defined in the hex file. Although ICPROG stores the current device in use between sessions you have to select a new device manually when you start a new hardware project Note: Fuses and oscillator settings are controlled from the hex file so all you need to do is check that they match your settings in the compiler or assembler. Hit the open button to load your hex file. Note how the oscillator, write enable and fuses have changed (controlled from the hex file):
Erase deviceSo this command quickly erases the chip. Note: You don't have to use the erase button as the program button will overwrite the chip contents anyway. It is sometimes useful if you want to convince yourself that the program is actually programmed into the device correctly. Program deviceVerify deviceNote: Depending on settings in menu : Settings--> Options--> Programming verification may automatically happen at the end. Once you get used to ICPROG and your hardware works reliably you may only want to do a verify if something does not work otherwise it takes more time up. Read deviceThese are the only controls you need for successful PIC programming using ICPROG. |
|||||||